Pre-requisites:
- Laptop
- Network wires.
- Internet connection.
Diagram:

Pre-configuration:
- 1- Create Zones. (Inside, Outside) or (Trust, Untrust) anything you want.
- 2- Create a virtual router.
- 3- Configure an Interface Management Profile to allow ping. (Internally, Externally).
- 4- Configure Interfaces for (Inside, Outside).
- 5- Configure Static Routes for the ISP. (Dynamically or Statically).
- 6- Configure a NAT policy to translate traffic from your source IP.
- 7- Configure a Security Policy to allow traffic to leave your firewall.
Step 1
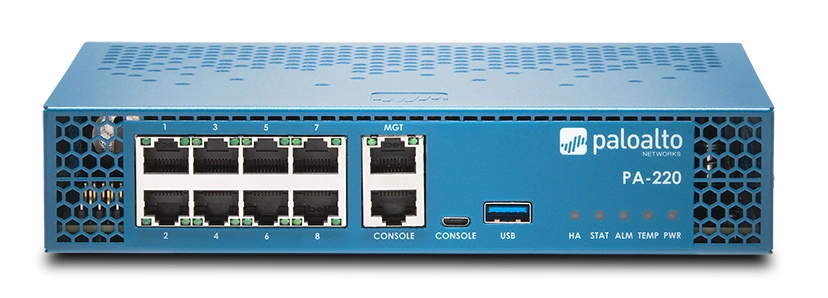
- 1- Connect your laptop to the management port (MGT). The default IP address for the firewall is 192.168.1.1
- 2- Configure your laptop with an IP address. In this case, 192.168.1.100 /255.255.255.0
- 3- Make sure you can ping 192.168.1.1. If you can ping, then you should be able to browse the firewall GUI.
- 4- From your laptop, open Google Chrome or any web browser and type 192.168.1.1.
- 5- Type the username and password once you see the Palo Alto Login page. admin/admin.
Step 2
Creating Zone (Inside, Outside). Select the Network Tab. Hover the mouse to the left panel and click on Zones. At the bottom, click on (add). Then click OK.

Step 3
Creating a Virtual Router. Select the Network Tab. Hover the mouse to the left panel, and click on Virtual Routers*. At the bottom, click on (add) and give the name “VR-01.” Then click OK.
*Quick Note: Virtual Router is what we call the routing table database. It’s where all the IP addresses live, Static, connected, BGP, etc.

Step 4
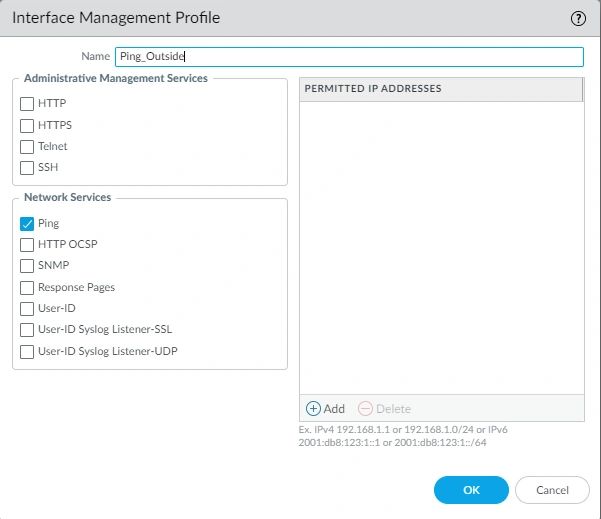
Create an Interface management profile* Select the Network Tab. Hover the mouse to the left panel and click on Interface Mgmt. At the bottom, click on (add). Name it “Ping_Outside.”
*Quick Note: The purpose of the management profile is to permit our network to be pingable from outside of our Internet and Internally.
Step 5
Configure Interfaces for the external and internal networks. (Outside, Inside). Select the Network Tab. Hover the mouse to the left panel, and click on Interfaces.
Let’s configure ethernet1/1 (Outside) Dynamically. Select this option if the firewall sits at home with a dynamic IP.
Click on ethernet1/1.
Add a comment, “Outside Network.”
Interface type, Layer 3.
Config Tab
- Virtual Router, select the “VR-01.”
- Security Zone, select “Outside.”
IPV4
- Select DHCP Client.
Advanced
- Click on Advance and select the management profile “Ping_Outside.”
- Click OK.
Let’s configure ethernet1/2 (Inside)
- Click on ethernet1/2
- Add a comment, “Inside Network.”
- Interface type, Layer 3.
- Virtual Router, select the “VR-01.”
- Security Zone, select “Inside.”
- Click on IPV4 and put your internal IP address. In my case will be “192.168.10.1 /24.”
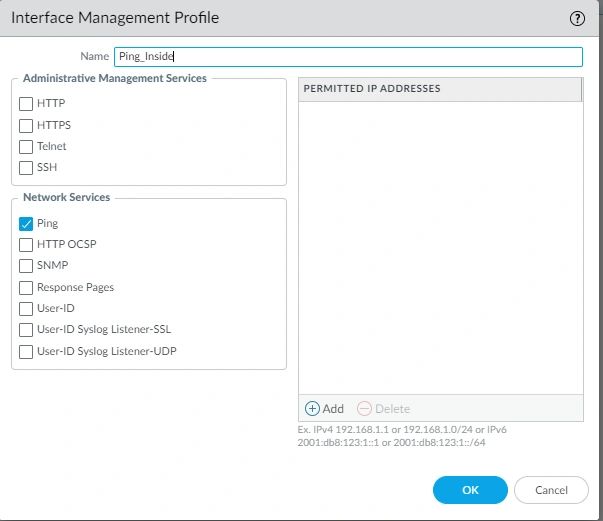
- Click on Advance and select the management profile “Ping_Inside.”
- Click OK
This is how it should look.

Quick Note: A static route is not needed. The DHCP will install it for you. Move to steps 7-8.
Let’s configure ethernet1/1 (Outside) Statically. Select this option if you have blocks of IP addresses.
- Click on ethernet1/1.
- Add a comment, “Outside Network.”
- Interface type, Layer 3.
- Virtual Router, select the “VR-01.”
- Security Zone, select “Outside.”
- Click on IPV4 and put your own internet IP address. In this case, mine will be “100.100.100.2 /29.”
- Click on Advance and select the management profile “Ping_Outside.”
- Click OK.
Let’s configure ethernet1/2 (Inside)
- Click on ethernet1/2
- Add a comment, “Inside Network.”
- Interface type, Layer 3.
- Virtual Router, select the “VR-01.”
- Security Zone, select “Inside.”
- Click on IPV4 and put your internal IP address. In my case will be “192.168.10.1 /24.”
- Click on advance and select the management profile “Ping_Inside.”
- Click OK
This is how it should look.

Step 6
Configuring a default route statically. This will allow the hosts to leave your network to the outside.
If you have a block of Ip addresses, you need to point the outside interface to the next hop address. Which is your ISP gateway.
Configure Static routes for the internet (Outside)
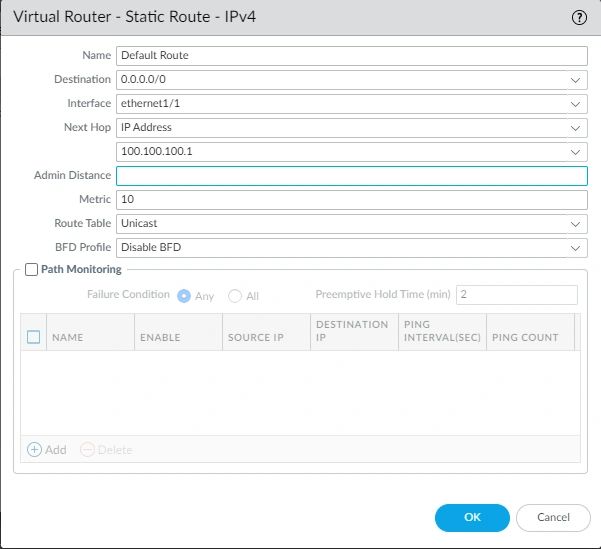
Select the Virtual Routers. At the bottom, click on the VR-01. Click on the Static Routes and (add).
Name: Default Route
Destination: 0.0.0.0/0
Interface: ethernet1/1
Next Hop: IP address. (Your Default gateway ISP address).
Add the IP address in the empty slot.

Step 7
Create a NAT rule to translate your private IP using your public address: Select Policies. Hover the mouse to NAT. At the bottom, click on (add).
General Tab
Name, “Users_outbound.“
Description, Allow users to surf the internet.
Original Packet Tab
1- Source Zone, click on (add), and select, Inside.
2- Destination Zone, Select Outside.
3- Destination Interface, ethernet1/1
4- Service Any.
5- Source Address, click on (add) and type 192.168.10.0/24.
Translated Packet
Source Address Translation, select, Dynamic IP And Port.
Address Type, select Interface Address.
Interface, select, ethernet1/1.
IP address, 100.100.100.2/29
This is how it should look.

Step 8
Create a security policy to allow traffic from inside to outside: Select Policies. Hover the mouse to the left panel and click Security. At the bottom, click on (add).
General
Name, type, Inside_Outside.
Description: This rule allows the network 192.168.10.0/24 to surf the internet.
Source
Source Zone, select Inside.
Source Address, type your Inside network like you did on the NAT policy. 192.168.10.0/24.
Destination
Destination Zone, select Outside.
Everything else can be set as any/any.

NOTE: This configuration is only to provide basic connectivity. None of the threat features has been enabled yet. I will talk about this in a different post.
How to test the internet connection.
- Connect the laptop to port 2 (ethernet1/2), and give the laptop an IP address. 192.168.10.100/255.255.255.0/192.168.10.1. DNS 8.8.8.8, 1.1.1.1
- Ping the firewall default gateway 192.168.10.1. You should be able to see a reply. In case otherwise, check the management profile in the interface.
- Ping Google DNS. 8.8.8.8. If successful, ping the FQDN google.com. If you are getting replies, you now have internet access.
- Now you should be able to surf the Internet.